Tuesday, July 31, 2012

Awesome gluten free pasta


 red bean fusilli

I just wanted to post a quick link here to this amazing red-lentil flour pasta that I found in a grocery store in Toronto this weekend. The ingredients consist of two things: water and red-lentils, yep that it JUST water and red-lentils. So they are SCD safe* and impossible to differentiate from real pasta! They are even healthier than real pasta, I am ordering a batch from amazon. They are made by ecochefs a Toronto-based company. Here is the link to their website if anyone is interested.

(*well you can't be sure that the lentils were sufficiently soaked/rinsed before being made into pasta as suggested by the strict diet guidelines but we tried them with  no ill effects and when you cook it its soaked..*)

Review of Brownie Recipe (using coconut flour)

I was really craving chocolate (again I know) so I decided to use the cacao nibs grind them up like cocoa powder and try out the chocolate brownie recipe found here on the comfy belly blog. They turned out so well that I made them yesterday and the only picture I have of them is the two that are left! They are even better after being chilled in the fridge for a day.  I also added a peanut butter icing to give them a Reese-like taste. I am sure they would work just as well using cocoa powder as is suggested in the original recipe.


So I only altered the recipe a little as follows:

Ingredients for brownie batter
  • 1/2 cup plus one tsp of coconut flour
  • 1/3 cup of ground up cacao nibs ( with enough water to cover and blend in blender)
  • 4 eggs
  • 1/2 cup of honey
  • 1/2 teaspoon of vanilla
  • 1/3 cup of melted butter 
Ingredients for Peanut Butter Icing
  • 4 tablespoons all natural peanut butter
  • 2 -3 tablespoons honey

Instructions

  1. Blend nibs in blender until coarse powder add enough water to cover and continue to grind until the mixture is as fine grained as you can get it, it'll look like a brown liquid(nib juice as I dubbed it)
  2. Combine nib juice with coconut flour and make coarse breadcrumb like texture
  3. Preheat oven to 350°F/175°C.
  4. In a separate bowl, whisk together the eggs, honey, butter, and vanilla until well blended.
  5. Combine the cocoa mixture and egg mixture and blend well (with a mixer if possible).
  6. Line a baking pan with parchment paper or just grease it well and use a spatula to scoop the batter into the pan.
  7. Bake for 25 minutes, or until a toothpick inserted in the middle of the brownies comes out clean.
  8. While batter is baking mix peanut butter and honey and spread on top when brownies are done and cooled.

Friday, July 20, 2012

Pecan Pie!!

 I was reading one of those silly mystery novels about old ladies who cook and bake and make tea and solve crimes and there was a recipe for pecan pie at the end of it. I had never even considered the fact that I might be able to make my own pecan pie. It seems like one of those extremely complicated desserts and I was surprised at how easy it looked so of course I had to give it a try. It was not difficult at all the most difficult part was making sure not to leave the pecans toasting in the oven too long and burn them..which of course I did ... but I saved enough not burnt ones to make it anyways and it still turned out wonderfully.


 Ingredients For Pie Crust

  • 1 1/4 cup almond flour
  • 3/4 cup coconut flour
  • 1/4 cup butter -melted
  • 1 egg
  • 6 TBSP apple sauce -more if still too dry
  • pinch salt
 Instructions
  1. PReheat oven to 350 F. Combine flours and salt first.
  2.  Stir in egg and butter to get coarse mealy texture.
  3. Slowly add apple sauce until you get a thickness that will be able to be pressed into a greased pie pan without falling apart. Adjust amount of apple sauce needed as necessary. * Note this crust ends up as a soft crust not a crispy one, I suspect if you used all butter instead of applesauce and cut out the egg it would be much crisper but I didn't want to use that much butter as there is also butter in the pie itself.*
  4. Bake crust in oven for 20 min while you prepare the filling.

Filling Ingredients 

  • 1 1/3 cups pecans
    1/2 cup melted butter
    3 lightly beaten eggs 
  • 1 1/4 cups Honey
  • 1/4 tsp salt
  • 1 tsp vanilla extract


Instructions
  1. Place pecans on baking pan and roast in oven for ~3 minutes checking very often ( my recipe said 6-7 minutes but that turned out to be too long so best to check to see if they are slightly browned and smell nice and remove them before they become too dark).
  2. Mix together butter,eggs,honey, salt and vanilla, whisk until smooth.
  3. Mix pecans into filling mixture and pour into prepared pie crust. Place pie in oven turn up temperature to 400 F and bake for 10 minutes to crisp outside. Cover pie with tin foil so crust doesn't burn and then turn temperature back down to 350 and bake for 35-40 minutes.

Monday, July 16, 2012

Ratatouille

I didn't have any eggplant but I had a lot of other vegetables on hand so I decided to give ratatouille a try now that we are finally incorporating some tomato into our diet.  My fiancee like it so much -and this from a guy who always wants meat- that he said I had to post it on this blog. So I definitely think it is worth a try.


Ingredients
  • 2 grated Carrots
  • 1 tbsp olive oil
  • pinch salt
  • 2 chopped garlic cloves
  • 2 1/2 grated Zucchini
  • 1 chopped onion
  • 1 1/2  large chopped yellow or red pepper
  • 3/4 cup grated cheddar cheese
  • 3/4 cup tomato sauce (check to see only tomatoes no sugar/other illegal ingredients)
Instructions
  1. Add oil to frying pan, fry onion and garlic for 1 min,  add carrots fry another ~ 5 minutes add zucchini and pepper and cook for another 10 minutes until vegetables are mostly cooked.
  2. Add tomato sauce and stir through. Pour  one layer of cooked vegetables into oven safe dish spinkle cheese on top add another layer of vegetables and more cheese on top.
  3. Bake in oven at 350 F for approximately 20 minutes.

Carribean-Inspired Feast: Chicken with Mango Salsa, lentils and Carrot Salad

 This meal in contrast with the last one I posted should be saved for sometime when you have a lot of energy for cooking and you don't mind spending time making a complicated dish. It is definitely worth all the work though the complex flavours mix really well and even though I don't really like mango usually,  it worked really well in the salsa with the chicken so much so that I may have to revise my opinion of mango !

Caribbean Chicken Marinade Ingredients

I adapted this from a recipe I found here  I cut down on some of the spices and removed the sugar to keep it simpler and easier on the tummy
  • 1 cup finely chopped onion
  • 1/3 cup  vinegar
  • 4 cloves garlic, minced
  • 4 ½ teaspoons olive oil
  • 2 teaspoons dried thyme leaves
  • 1 1/2 teaspoons ground allspice
  • 2 teaspoons honey
  • 1 teaspoon salt
  • 1 teaspoon ground cinnamon
  • 1/2 teaspoon ground nutmeg
  • Dash of cayenne pepper (1/4 tsp) or more to taste *depends on how spicy you can handle
  • 1 teaspoon black pepper
  • 6 boneless skinless chicken breasts
Instructions
  1. Combine all ingredients for marinade and taste to see if you like the spice level, adjust if necessary. Pour marinade into plastic bag add chicken and shake to coat. Place bag in fridge for minimum of 2 hours  or longer, you can leave it all day.
  2. Place chicken on heated grill barbeque or one of those George-forman type grills. Cook until done cut into chicken and it should no longer be pink.

 Mango Salsa

This can also be prepared ahead leaving time for the flavour to really blend. 

Ingredients
  •  3/4 Cup frozen mango pieces defrosted or same amount of fresh mango chopped into small cubes
  • 1/2 onion chopped
  • 3TBSP fresh lemon/lime juice
  • 1 tsp cayenne pepper
  • pinch salt and pepper
  • handful of chopped fresh parsley and oregano if available
  • 1/2  avocado chopped
Instructions
1. Combine ingredients in bowl and let sit for at least one hour.

Carrot Salad


Ingredients
  • 2 Grated or Julienned Carrots
  • 3 TBSP vinegar
  • 3 TBSP olive oil
  • several sprigs of fresh mint and parsely chopped
  • 1 tsp honey
  • 1/2 tsp dry mustard
  • salt and pepper to taste
Instructions
  1. Combine all ingredients in bowl toss and serve.

Finally prepare lentils according to package directions (usually rinse boil, drain and serve with melted butter on top) and serve all dishes together for a wonderful meal!


Sausage Balls on a Bun with Asparagus

I came up with this idea while trying to think of something I could make very quickly for dinner. This took only a half hour to prepare overall!

Instructions

Hot Dog Buns
First make the buns and pop them in the oven. I used the basic recipe for  SCD Muffins or Bread that I posted here earlier and I added a little bit more coconut flour so that it was firm enough to shape into four oblong "hot dog bun" shapes.  I baked these in the oven for 20 minutes.

Sausage "Meat Balls" and Asparagus

Ingredients
  • Organic wheat/sugar free sausage *make sure to check labels very carefully or ask butcher it is impossible to find these in a regular grocery store
  • Tomato Sauce *again check ingredients
  • 1/2 tsp oregano and basil
  • 1 clove garlic 
  • as many asparagus as you think you will eat
  • 1-2 lemon slices
  • 1 tsp butter
  • 1TBSP veg oil for frying
Instructions
  1. Cut up sausage bits to bite sized pieces (so they cook faster) turn on stove-top under frying pan to medium heat add a little bit of oil and sausages leave to cook turning occasionally
  2. In a microwave safe dish place washed trimmed asparagus and enough water to cover them. Cook on high in microwave for 12 minutes.
  3. Chop up garlic add to sauce pan and fry for 1-2 min add tomato sauce and spices and heat through until bubbling, then turn off heat.
  4. Remove asparagus from microwave drain squeeze lemon juice over them and spread butter to melt on top.
  5. Finally remove cooked buns from oven slice in half place cooked sausage in the bun and top with tomato sauce. Serve with asparagus and enjoy!

Thursday, June 28, 2012

Excellent Recipe for SCD Muffins or Bread!


I have been trying to find a good recipe for bread for a while and while a lot of the recipes I tried made muffins ok they did not work as bread and they were pretty dense. I finally went back to 
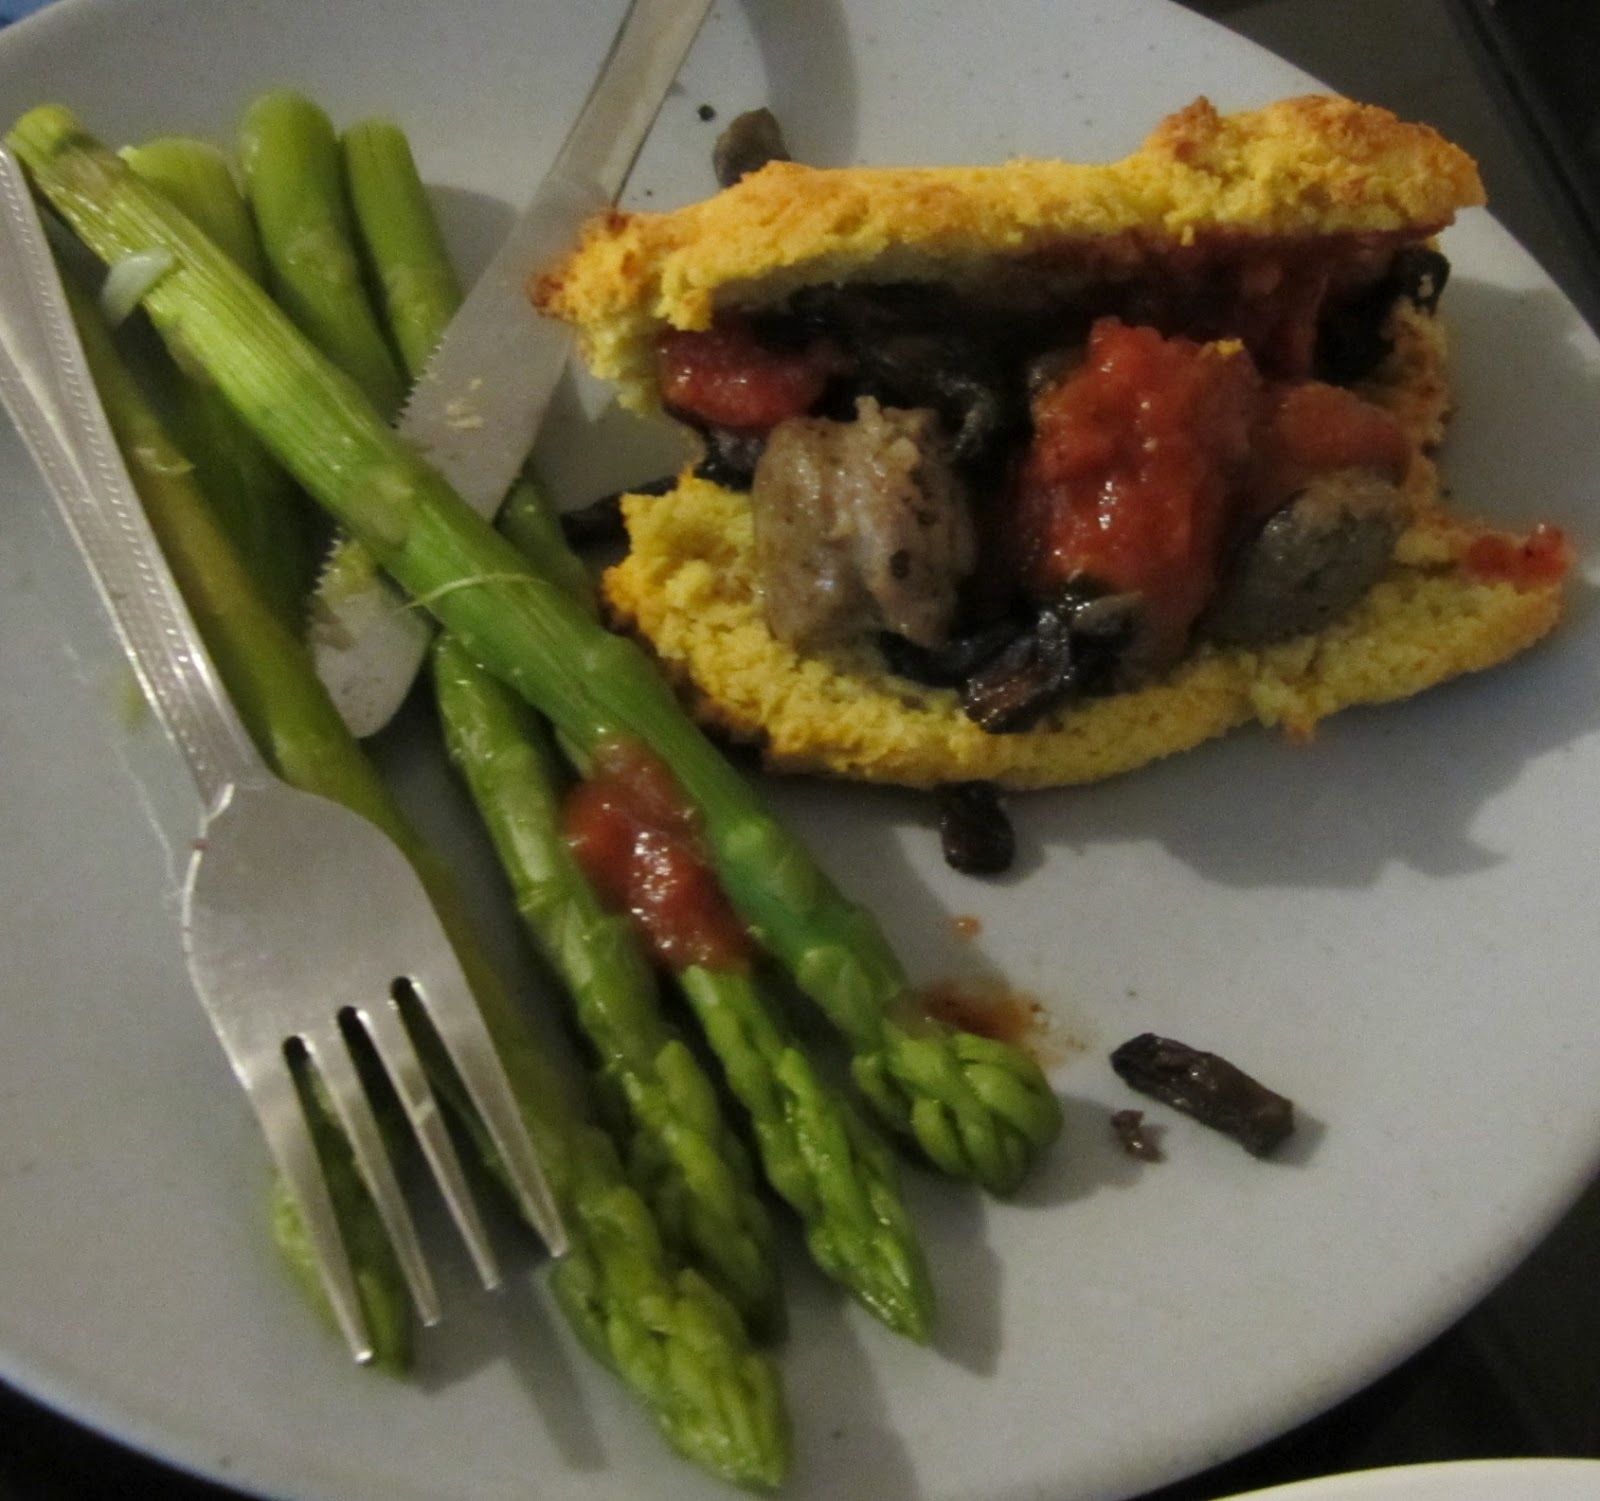
Breaking the Vicious Cycle and tried out Lois Lang's Lucious Bread Recipe with slight modifications to cut down on the amount of almond flour needed and I think the cottage cheese is the secret because it really works !  The muffins puffed up beautifully and the bread did too (except that may not be obvious in the picture as I cooled it upside down and compressed the top accidentally) .  What is amazing is that not only did it taste great but the bread was also easily slicable so finally its easy to have toast!  I made a quick "jam" by cooking on the stovetop berries,rhubarb, applesauce cinnamon and honey and this is perfect for spreading on the muffins or toast. I think the bread will also work for sandwiches or its a good side for the casserole or some soup.
  

Ingredients

1  cup blanched, ground  almonds
1/4 cup coconut flour (heaping)
2 heaping Tablespoons of Peanut Butter (all natural, no sugar, another type of nut butter would also work)
1  teaspoon baking  soda
1/4 teaspoon  salt
1/4 cup  melted  butter
 3  eggs
1 cup  dry curd  cottage cheese  (press  down as you  measure*)


Instructions
Preheat oven to 350°F  (1 80°C)

Place eggs, melted  butter,  dry  curd cottage cheese, peanut butter, baking soda, and  salt  in food processor.  Process until the mixture is thick and  resembles butter  in texture.

Empty mixture into bowl, add  almond  flour and coconut flour  and fold in just until all flour is absorbed.
Grease a  loaf  pan  (about  4" x  8") or muffin tins generously with butter/oil 
Drop spoonfuls of dough into muffin cups or pour all dough into loaf pan and smooth with spatula

Bake loaf at 350°F  for about 45  min  until  lightly  browned on top, muffins take less time 25-30min. Check  by inserting  a wood skewer and see if it comes out clean, if it does its done!

Remove muffins/loaf from pan by loosening their/its sides with knife/skewer. Let cool completely before slicing. Once sliced can be kept in the freezer for a long time and toasted whenever its needed.
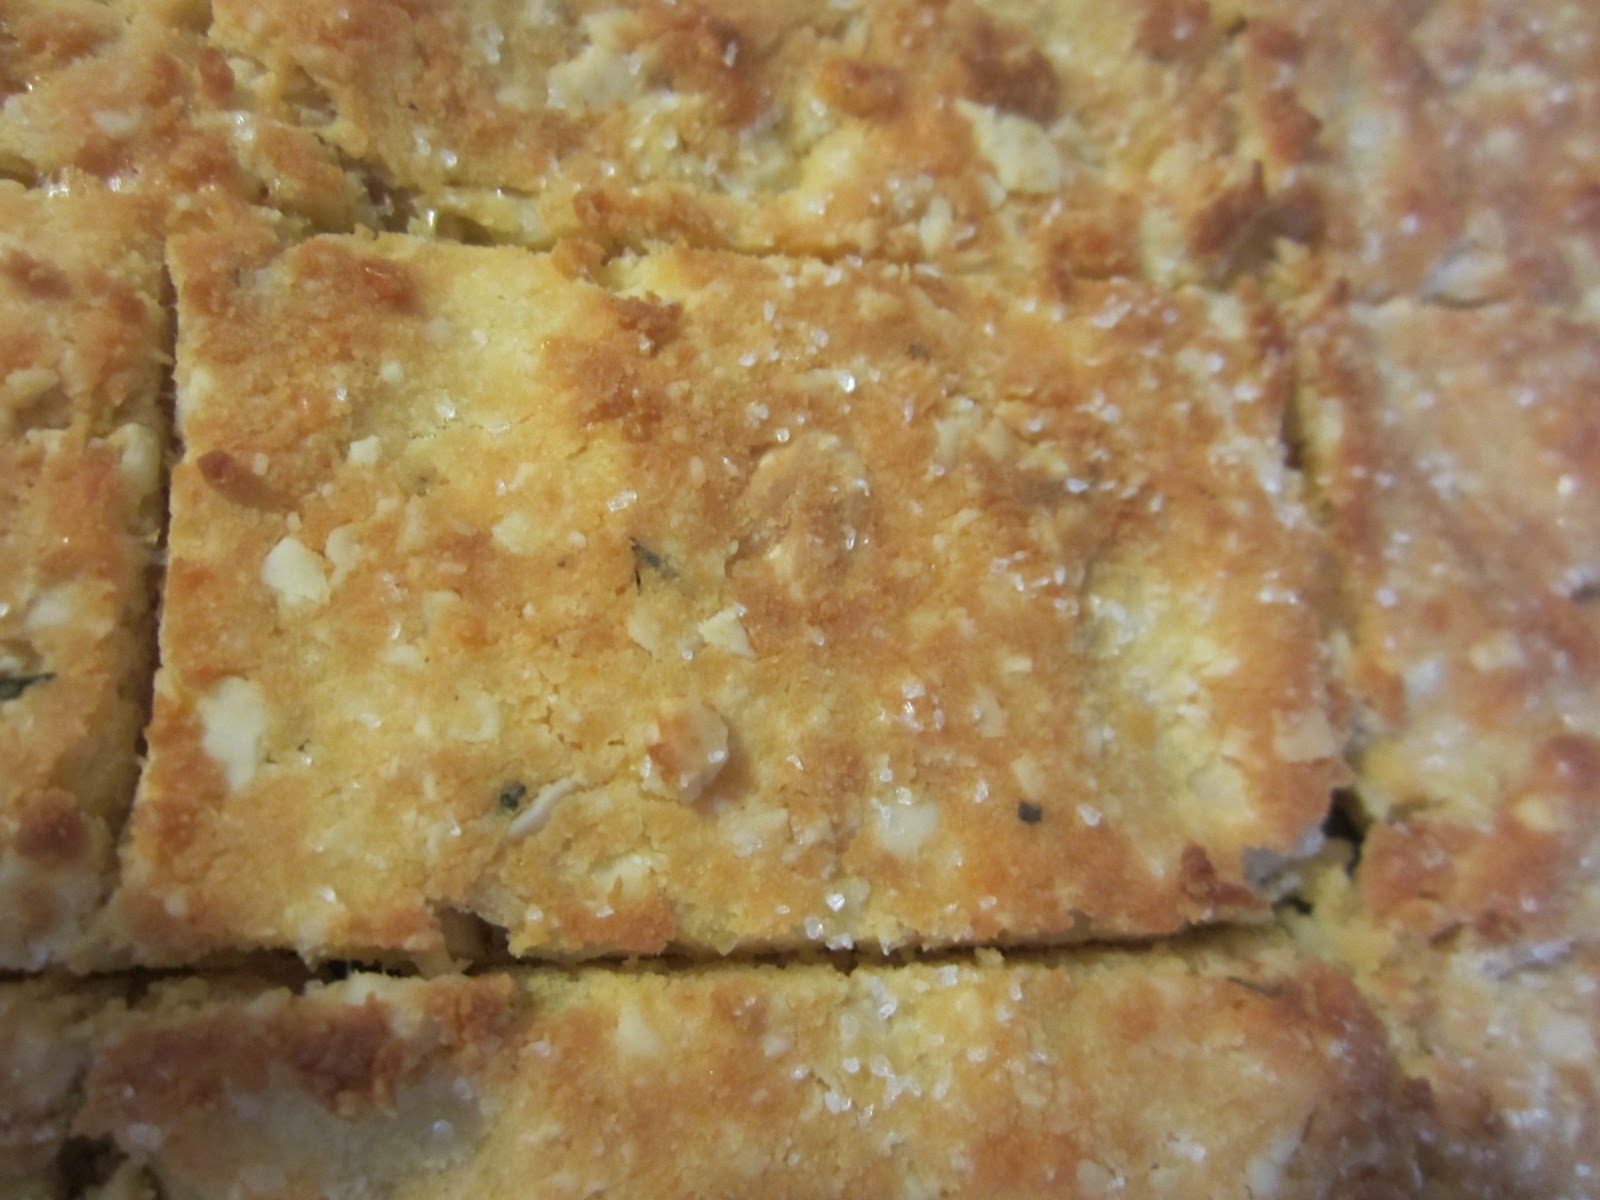
Slices Ready for the Freezer
Closeup of Bread Texture


Chicken Casserole

I wanted to make a  cheesy casserole but all the recipes I could find called for yogurt instead of cream or milk. We have found that adding yogurt adds a sour taste to things and I didn't think this would work for the casserole. Since the SCD diet recommends using dry curd cottage cheese as a lactose free protein we have a lot of it around.This sparked the idea of using it as a creamy substitute instead ! I sort of just threw everything else that we had in the fridge that was "safe" to eat and I think it turned out really well kind of like a french gratin :)

Ingredients

  • 3/4 cup dry curd Cottage Cheese
  • 3 Mushrooms
  • 3-4 chicken breasts or equivalent amount of chicken meat
  • 2 zucchini
  • 2 TBSP melted butter
  • 1/2 onion
  • garlic
  • 1/2 cup grated swiss cheese
  • 1 carrot
  • 2TBSP water
  • dash (~ 3 TBSP)dry white wine
  • 1/4 cup chicken stock (homemade or check label carefully)
  • dash salt and pepper

 Instructions 

  1. Preheat oven to 375

  2. Chop onion, mushroom, chicken and garlic and grate/finely chop zucchini and carrot either by using a grater, knife or blender (I used my "big boss" blender/food processor)

  3. Put cottage cheese in food processor with melted butter and water, process until creamy * it won't be perfectly blended there will still be small cheese bits but this won't be noticeable in the end

  4. Place vegetables and chicken in an oven safe casserole dish add wine,stock, cottage cheese mixture and half the Swiss cheese and mix sprinkle remaining cheese on top

  5. Bake in oven for 45 min and its done!

Friday, June 22, 2012

Cheese Crackers

I combined two recipes to produce these, this coconut flour recipe  and this almond flour recipe  because I was afraid the coconut flour one would taste too much like coconut and I wasn't sure how well that would work with the cheese flavour.


Ingredients

  • 1/2 cup coconut flour
  • 1/2 cup almond flour 
  • 2 eggs
  • 2 tablespoons butter (soft)
  • 1/4 cup oil 
  • 1 1/4 cup shredded cheddar cheese
  •  Pinch salt
  • 1/8 teas. cayenne pepper
  • 1/8 tsp thyme
  • 2 tbsp cold water

Instructions 

  1. If  using whole almonds grind before hand into flour then add all ingredients to blender and mix well 
  2. Dough should be knead-able with your hands if it is not add water or flour to achieve correct consistency
  3. Grease baking sheet with oil/butter. Roll out dough onto baking sheet and press with hands to make thin layer ~ 1/2 cm thick
  4. Cut dough with knife into squares  and sprinkle some extra salt on top
  5. Place in over at 350 for ~ 12 min then turn on broiler for 2 min to brown tops
  6. Remove from sheet and enjoy ! 
 

Tuesday, June 19, 2012

Guacamole Mushroom Burgers

 These are very easy to make and make a quick but yummy dinner. I just had this idea because I wanted a burger but we can't use buns.


Portobello Mushroom "Bun" Ingredients
  • 2-3 large Portobello mushrooms ( or however many burgers you are making 1 mushroom = 1 bun)
  • 2-3 TBSP olive oil
  • pinch salt
Mushroom Instructions
  1. Wash mushrooms, carefully slice in half with gills facing down on cutting board (this bit is tricky it took me a few trys to get it the right thickness without falling apart).
  2. Rub top and bottom with olive oil and sprinkle with salt
  3. Place on baking sheet and broil in oven for ~10 min or until mushrooms are cooked but not burnt (check often they burn easily)
Guacamole Ingredients
  • 1/4 onion sliced very fine
  • 2 cloves garlic (minced)
  • 2 TBSP lemon juice
  • 1 ripe Avacado
  • TBSP cottage cheese (optional)
  • pinch salt
 Guacamole Instructions
  1.  Mash avacodo or puree in blender
  2. Add other indredients and blend or just stir together
Chicken Burger Ingredients
  • Skinless, boneless chicken breasts
  • 1/2 tsp paprika
  • 1 clove garlic
  • 1/2 tsp salt
  • 1 TBSP olive oil
 Chicken Burger Instructions
  1. Sprinkle garlic, salt and paprika over chicken
  2. Pour olive oil in frying pan and fry over medium heat until cooked through flipping half way through cooking. (OR for even tastier burgers if you have a BBQ grill chicken breasts)
  3.  When finished assemble burgers using mushroom-halfs as buns and spreading the guacamole on top! 


Sunday, June 10, 2012

Almond-Coconut Flour Peanut Butter Cookies

 I found a recipe for almond flour based peanut butter cookies here  but I wanted to use coconut flour as well as almond flour since it is cheaper and very healthy.  So I modified this recipe for coconut flour and it turned out pretty well my first batch I didn't let sit I just popped them straight into the oven and they spread out a bit more my second batch I let the batter sit a while do the coconut flour absorbed all the liquid and that batch was better more like the peanut butter cookies that I am used to with regular flour.


Ingredients (makes 22-24 cookies)
  • 3/4 cup oil
  • 1 cup peanut butter (all natural no sugar added)
  • 1 cup honey
  • 2 eggs
  • 1 1/2 tsp vanilla extract
  • 1 3/4 cup almond flour
  •  1/2 cup coconut flour
  • 1/4 tsp salt
  • 1 tsp baking soda
  • optional~ cacao nib bits *not technically SCD legal see chocolate nib cookie recipe* I tried these but I think next time I would leave them out as these cookies are good on their own and don't need the added flavour of the nibs*

Instructions


  1. Preheat oven to 350 F
  2. In a mixing bowl combines coconut flour, almond flour, salt and baking soda.
  3. In a blender or bowl with electric mixer combine oil, peanut butter and honey. Slowly add eggs one at a time, finally add vanilla.
  4. Pour liquid into dry ingredients and mix well until no lumps
  5. Let dough sit 5 min before cooking, this is important to let coconut flour absorb the extra moisture!
  6.  Grease cookie pan and drop TBSP full scoops of dough onto pan ~ 4 cm apart.
  7. Bake in oven 7-10 min

Thursday, June 7, 2012

Chocolate-Nib Coconut Cookies

The main thing that I don't like about the SCD is that chocolate is not allowed and I love chocolate!   I looked on the SCD legal/illegal list and it says you can't use cocoa powder which makes sense since it is likely they add additives and the no chocolate rule also makes sense because it all has milk and sugar, but other bloggers have suggested using cacao nibs. These are the raw form of chocolate, the beans before they've undergone major processing. I tried this recipe and  it turned out great. I've since seen other comments that even the beans may have a compound that some people react to and so may not be technically SCD legal for everyone, but we have had no ill effects and they are delicious! I modified the recipe I found here by decreasing the liquid to compensate for using honey instead of sugar (and by adding chocolate of course!).

A Note About Cacao Nibs: These are actually surprisingly healthy for you, according to the package they contain beta-carotene, zinc and magnesium and actually contain more antioxidant flavonoids than blueberries, red wine or even green tea! I found mine at a local health/organic food store but if you can't find them there they are also available online. While they are  pretty expensive, they are worth a try, they have a really unique flavour, dark chocolate mixed with something more complex and they go really well with the coconut flour.


A Note About Coconut Flour:  Coconut flour is  different from other kinds of flours for a variety of reasons. Firstly, it has much less carbohydrates per serving which is why people often eat it to lose weight. For example,100 g of whole grain wheat flour has 76 g of carbohydrates while the same amount of coconut flour has only 65g. The fiber content of coconut flour is also the highest of any other type of flour! This means that just 1 tbsp. contains about 3 g of fiber. It is low on the glycemic index so it won't spike your blood sugar levels quickly and it is also very high in protein: it contains 19.3g of protein per 100g. If you want more interesting facts about how healthy it is see here. However, there is one downside, because of its high fiber content, eating too many baked goods made with coconut flour at any one time can give you a stomach ache. These cookies in particular are very filling so make sure to pace yourself!


Cookie Ingredients
  • 1/2 cup plus 2 TBSP honey*
  •  3 eggs
  • 1/4 tsp vanilla extract
  • 1/4 tsp salt
  • 1/4 cup melted butter
  •  3/4 cup Coconut flour
  • 4-5 TBSP Raw Chocolate (Cacao) Nibs
*Note: These cookies are not super-sweet, which in my opinion is good because they make a great snack but you are not tempted to eat too many, you can add more honey if you want but you may need to add more flour to compensate*


 Instructions
  1. Preheat oven to 375 F.
  2. Beat eggs together with honey, vanilla extract and melted butter.
  3. Take Cacao nibs and grind in blender/ food processor 10-20 seconds to make a coarse meal.
  4. Add coconut flour, salt and ground nibs to liquid batter stir well to mix all ingredients in, let sit 3-4 min to make sure coconut flour absorbs all liquid, the cookie dough should be of a consistency that is easy to shape into little round balls.
  5. Grease baking sheet and  scoop batter and  form small balls and flatten on baking sheet as shown above.
  6. Bake cookies in oven  for 10 minutes or until brown on bottom.
  7. Cool and enjoy! They don't need to be refrigerated unless they don't get eaten in 2 weeks..which in my house is highly unlikely :).

YUM!


Tuesday, June 5, 2012

Middle Eastern Kibbeh Tortillas

 Middle Eastern Kibbeh Tortillas


I first got the idea for these while reading Kendall Conrad's book Eat Well Feel Well .
I highly recommend her book it is full of really amazing gourmet recipes. I initially tried out her kibbeh recipe but I felt unsatisfied using lettuce leaves as a substitute for the normal bulgur or wheat based wrappers. I also really wanted a tortilla with cheese but we aren't eating tomatoes yet and so I had to get creative to come up with a sauce that worked and some sort of vegetable accompaniment.  The result is a somewhat unorthodox but very tasty meeting of Mexican and middle eastern cuisine  a coconut flour tortilla filled with kibbeh meat, topped with a zucchini "salsa" a yogurt based sauce and delicious melted cheese. The tortillas may still need some perfecting I pulled the original recipe from here but I had to tweak it quite a bit and the tortillas ended up as more of a cross between a crepe and a pita than a tortilla but they were still great.

Tortilla Ingredients (makes 6-8 tortillas)
  • 7 tablespoons coconut flour (available from bulk barn)
  • 1/2 teaspoon baking soda
  • egg whites 
  •  3 whole eggs
  • 5 tablespoons homemade yogurt
  • 5-6 tablespoons water
  • pinch of salt 
Zucchini "Salsa"Ingredients 
  • 2 whole zucchini
  • optional frozen thawed (precooked carrots)
  • 2 cloves garlic minced
  • 1/4 onion chopped
  • salt and pepper to taste
  • 2-3 TBSP water
  • vegetable oil/olive oil
Kibbeh Ingredients 
  • 2 lbs lean ground beef 
  • 1 teaspoon salt
  • 3/4 teaspoon allspice 
  • 1/2 teaspoon cumin
  • 1/4 teaspoon cinnamon
  • pinch/light sprinkle of paprika and cayenne pepper
  • 1 1/2  medium onions chopped
  •  2 cloves garlic minced
  • 1/2 cup grated cheese (for topping) Swiss or cheddar is best for SCD
Yogurt Sauce
  • 1/2 cup  homemade yogurt (see here for explanation of how to make  yogurt/why its important) 
  •  2 cloves garlic ( quickly fry garlic if you want a less intense flavour or if you are just starting diet)
  • 1/2 tsp cumin
  • pinch paprika
  • pinch salt
  • 1 TBSP apple cider vinegar( lemon juice would also work)

Instructions  

Step 1 Make Tortillas

  1. Mix the coconut flour and baking soda and salt with the water, yogurt and eggs. Whisk or blend until all lumps disappear (I used my "big boss" magic bullet type blender) . Should be crepe batter like consistency if not add a bit more water.
  2. Heat 2 tbsp oil or butter in frying pan on medium high heat. When hot, pour batter in center of pan so approx 3/4 of bottom of pan is covered in thin layer. Tilt the pan around to spread the batter into a large circle, almost covering the entire bottom of the pan.
  3.  Wait until the edges are brown on the side of the tortilla, or until lifting slightly and bubble are appearing on top and carefully circle spatula around the bottom of tortilla until safe to flip.Flip the tortilla and cook for about 30 seconds on the other side.
Step 2 Make Kibbeh 
  1.  Chop onion and garlic and fry in 1TBSP oil/butter  in wok/frying pan for several minutes until onion is translucent and garlic is slightly browned
  2. Add ground beef and cook meat until almost fully brown ~ 5 min
  3. Add spices and salt  and continue to cook until meat is brown all the way through,  taste and add more of any of the spices if needed, turn off and set aside
Step 3 Make Salsa, Yogurt Sauce and Cheese Toppings
  1. Chop Zucchini into chunks that fit in a food processor or blender, add garlic,water onion, salt  carrot (optional) and pepper
  2. Blend until consistency of apple sauce, it is fine is  small chunks still remain
  3. Add oil to frying pan, heat on medium and pour mixture into frying pan cook on medium heat  stirring occasionally for ~15 min
  4. While zuchinni cooks,  add garlic, vinegar, cumin. paprika and salt to yogurt in a blender and blend quickly until consistency of a liquid sauce
  5. Grate cheese (cheddar or swiss)
Final Step: Assembly!

Put tortilla on plate top with kibbeh and zucchini salsa pour some yogurt sauce on top, then sprinkle some cheese on top and quickly pop in microwave to melt cheese, or if you want it crispy put assembled tortilla or baking pan and quickly bake in oven to melt cheese. Yum!


Friday, June 1, 2012

Apple Cinnamuffin

 I adapted this Recipe from several other I found online its mainly the one found here with a few small changes including substituting mainly coconut flour instead of almond flour (its cheaper and produces a lighter texture) and adding apples and vanilla. I agree with the author of this blog one of my favourite parts of being at the mall is the smell of Cinnabon.  I was amazed that these actually taste very much like Cinnabon and that delicious smell  will fill your kitchen as they bake!  I think the addition of apple makes them even more gooey in the centre, just like a cinnabon.
Muffin Ingredients (Makes 15-17 Muffins)
  • 1 cup of homemade yougurt, for an explanation of how to make this and why its important see here
  • 1/2 cup of honey
  • 5 eggs
  • 1 cup of Blanched Almond Flour
  • 1/2 cup Coconut Flour
  • 1/2 teaspoon of sea salt
  • 1 teaspoon of baking soda
  • 1 cup peeled and baked apples 

Cinnamon Topping Ingredients

  • 4 teaspoons of ground cinnamon
  • 8 tablespoons of honey
  • 4 tablespoons of  butter, melted 
  • ~4-5 drops of  Pure Natural Vanilla Extract (Check label to make sure there are no additives)

Instructions

  1. Preheat oven to 375 degrees F, peel and core ~2-3 apples, chop into slices place in pan/oven safe cookware add a tablespoon of honey a sprinkle of cinnamon and bake ~ 1 hr. Alternatively, you can put cut apples,honey and cinnamon in a bowl in the microwave and microwave on high for 5-6 minutes. This can be done ahead of time I usually do a lot of apples at a time and store cooked apples in the fridge, they are a great snack  and then measure out 1 cup to add to recipe.
  2. Preheat Oven to 310 F. Combine all the wet muffin ingredients (including apples) into a bowl and beat with a fork.
  3. Add the dry muffin ingredients and blend well with a spoon.
  4. Place cupcake liners in a baking pan, and fill the liners halfway with batter * the liners are key* I made these without the liners and the gooey centres were really hard to get out of the pan, next time I will definitely use these! Make sure that even though the batter is really thick it is covering the bottom of the liners.
  5. Blend all the topping ingredients well.
  6. Add about a tablespoon of topping to the center of each muffin.
  7. Now put another spoonful of batter on top of each muffin until the batter just about reaches the top.
  8. Evenly distribute the remaining topping over the top of each muffin.  Use a toothpick/skewer to poke at the top of each muffin and swirl topping and batter.
  9. Bake for about 25 minutes, or until a toothpick placed in the center of a muffin comes out clean and the tops are starting to brown.
  10. You can store for a few days covered, or in the refrigerator for 2 weeks or alternatively freeze and reheat later.